写在前面
相对于GitBook,GitHub Pages可拓展性更强,搭配Hexo和Action效果极佳~
配置GitHub Pages
- 创建一个新的Repository
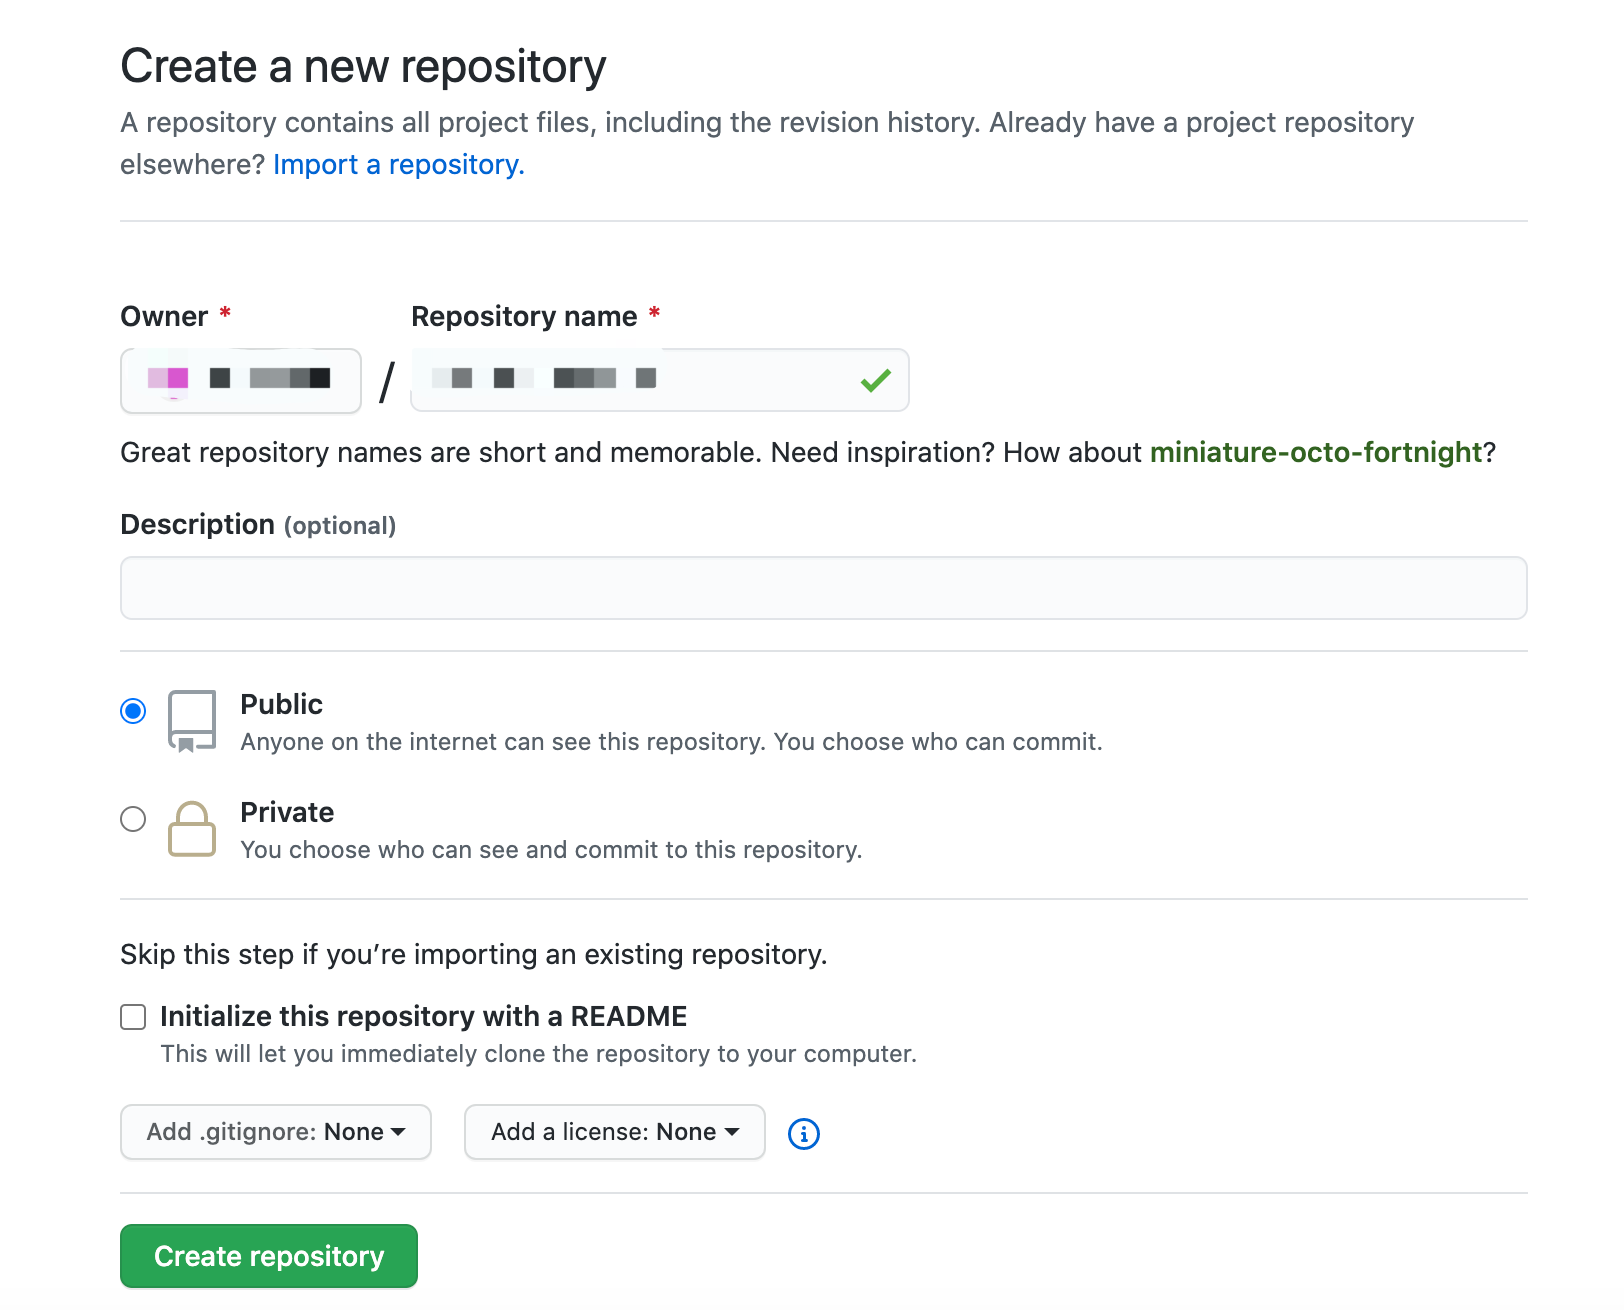
- 配置Repository
-
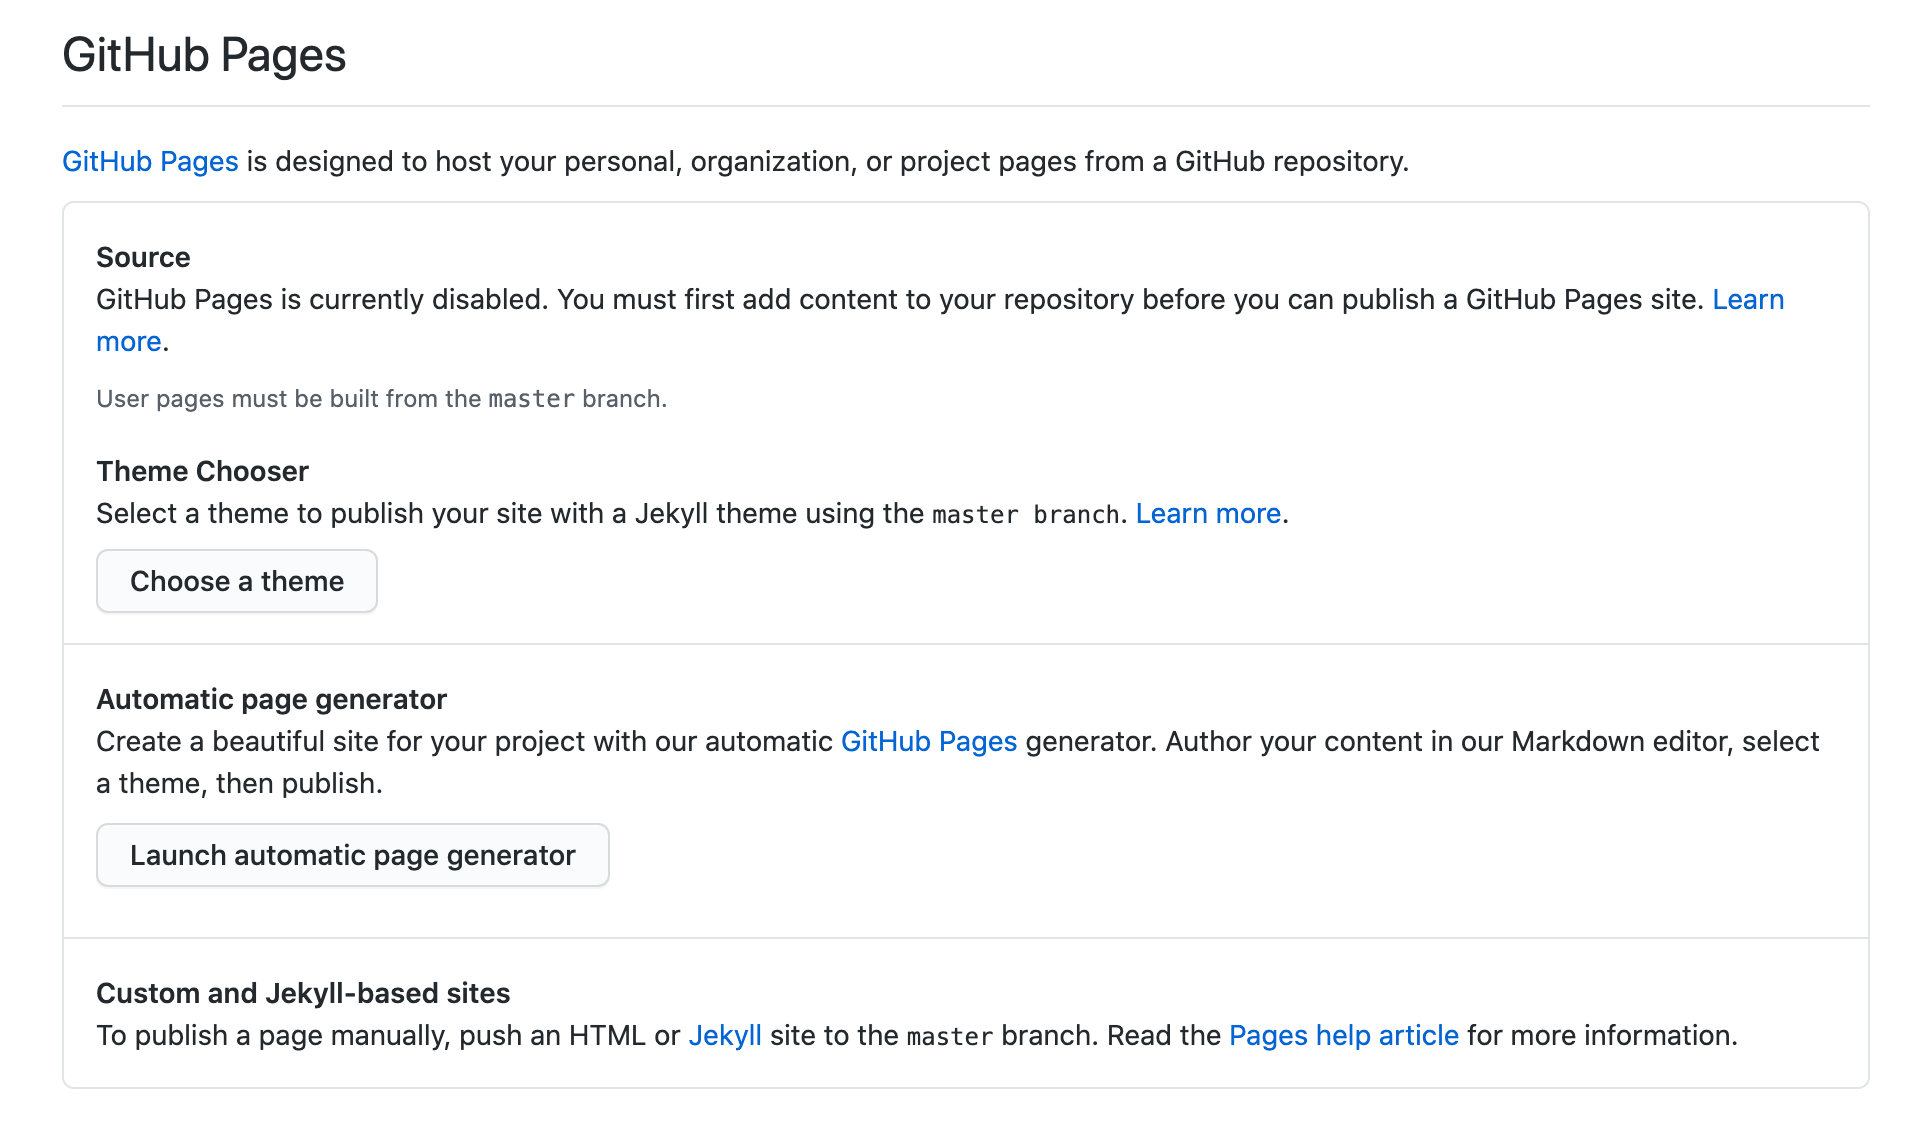
配置源
在过去的版本中,我们可以自由指定Source,即指定使用哪个分支的代码来构建博客;然而在新版本中,仅支持通过master的代码来构建博客。 -
配置主题
点击Choose a theme,选择心仪的主题。官方提供的Jekyll主题往往不尽如人意,如果你想使用Hexo替代,该步骤随意选择即可。
使用简洁高效的Hexo
环境准备
集成Hexo
Hexo的集成非常简单,主要分为三步:
-
基于模板创建Hexo工程
- npm install hexo-cli -g
- hexo init blog
- cd blog
- npm install
- npm install hexo-deployer-git
- git init
- git remote add origin 你的Repository地址
- git checkout -b source
-
配置Hexo工程
-
修改根目录下的
_config.yml文件中的deploy部分1
2
3
4
5...
deploy:
type: git
repo: 你的Repository地址
branch: master -
提交源代码
- git add .
- git commit -m “First commit”
- git push origin source:source
-
-
创建文章并发布
- hexo new “My first post”
- hexo clean && hexo g && hexo d
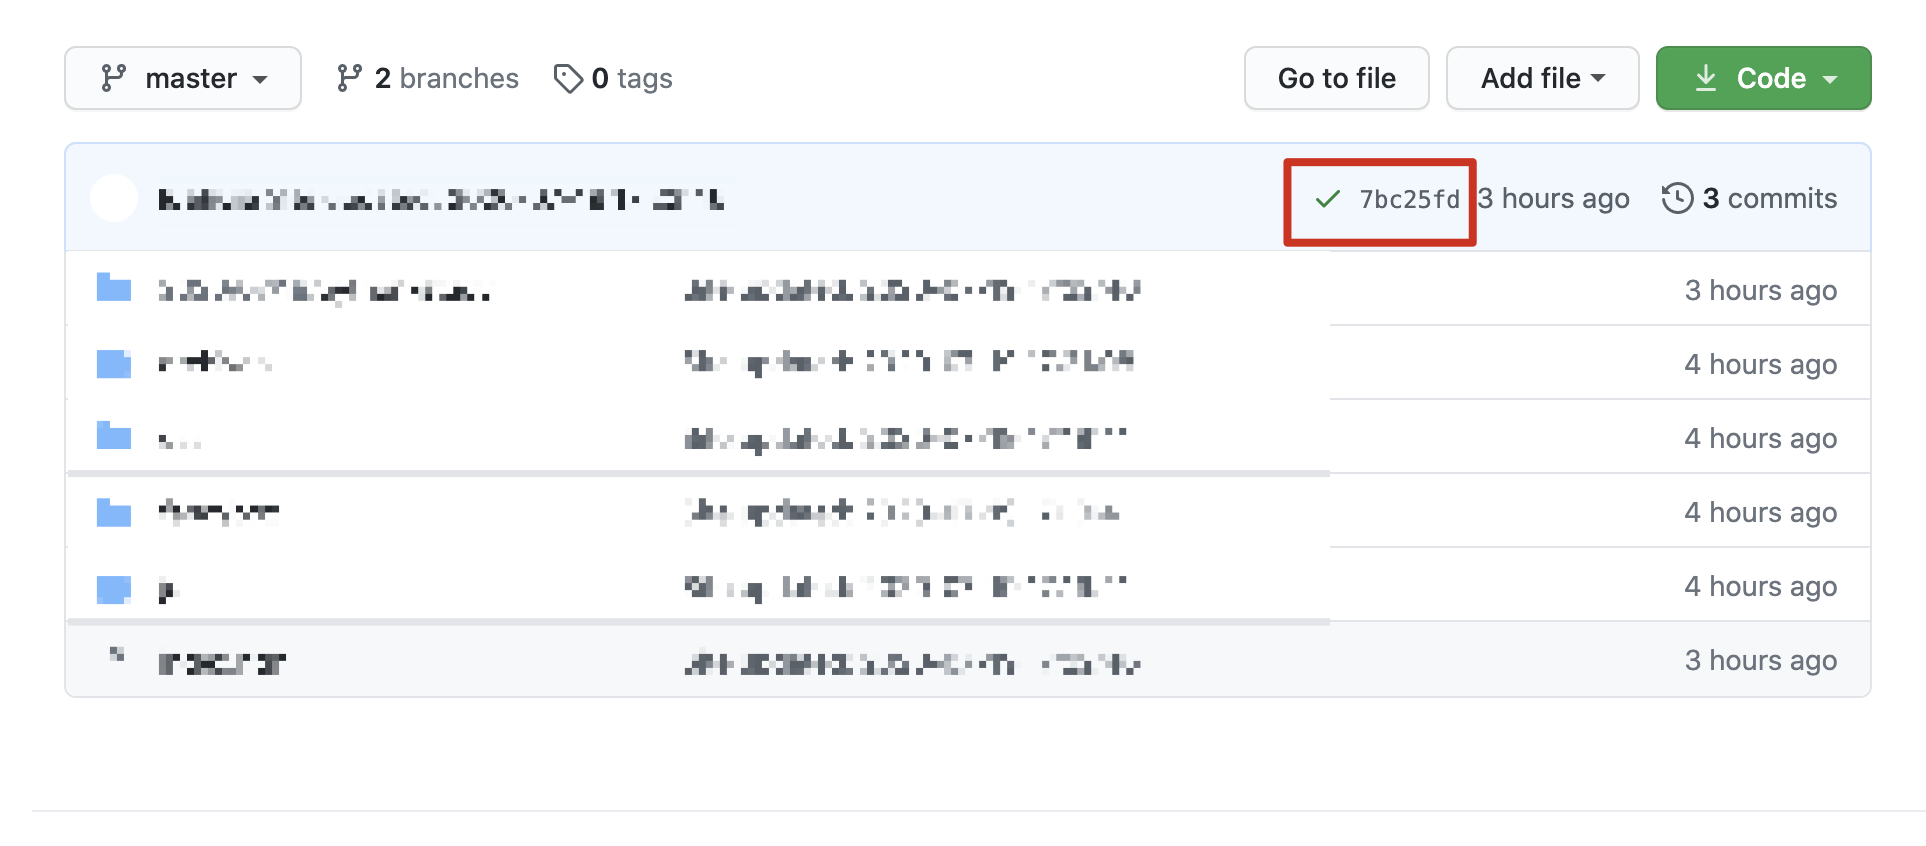
稍等片刻,待Repository主页提示构建成功后,访问GitHub Pages页面即可看到效果。
😨 Hexo默认样式太丑?
❤️ 没关系!Hexo提供了丰富的主题样式和插件,使用者可以自行选择。
访问统计
使用不蒜子实现访客人数统计

1 | <script async src="//busuanzi.ibruce.info/busuanzi/2.3/busuanzi.pure.mini.js"></script> |
看板娘
hexo-helper-live2d已做详细说明,本文不再赘述。
Action实现自动化发布
-
创建GitHub Token
点击右上角用户头像 -> Settings -> Developer settings -> Personal access tokens -> Generate new token -> 复制token -
创建Secrets变量
进入Repository主页 -> Settings -> Secrets -> New secret -> 输入上一步复制的token值并命名为M_GITHUB_PAGES_TOKEN -
创建并编辑
.github/workflows/deploy.yml
1 | name: Compile and Deploy to GitHub Page |
- 修改
_config.yml中的deploy.repo
1 | ... |
⚠️按照官方文档的描述,GitHub官方提供了一个GITHUB_TOKEN变量表示当前的Token值,且支持在workflow中使用。但不幸的是,在实际使用中,该值似乎并没有生效,因此才需要创建上面提到的所谓的M_GITHUB_PAGES_TOKEN变量。
写在最后
限于篇幅,描述未尽之处,欢迎在评论区留言 :p